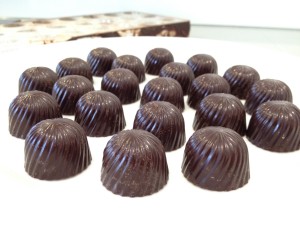
- Just before Christmas 2015 I discovered that chocolate dipped confit clementines were being made by one of the top chocolatiers in London. I was intrigued and I wondered if it was possible to replicate these beauties at home.
- So after Christmas I decided to start to experiment. It took me quite a long time to find a good recipe for a Confit Clementine although it was for a whole fruit and not individual segments. I decided to use the basis of the recipe but prepare the fruit into segments.
- The Confit Clementine recipe takes a minimum of 14 days with a further 2 days to slowly replace the water/juice in the fruit for the sugar so that the fruit is preserved and candied.
-
Chocolate Dipped Confit Clementine Segments
- Ingredients:-
- 7 to 8 Clementines
- 1 Cup of either Corn Syrup, Glucose Syrup or Honey.
- (may deepen colour if Honey used)
- Water to cover
- 2 cups Granulated Sugar (added initially)
- ½ cup additions of Granulated Sugar every 2 days
- Equipment:-
- 1 no Pot or Kilner Jar that will hold the fruit and allow the fruit to be covered with approximately 1 inch (25 mm) of water.
- 1 no Saucepan that will take the volume of syrup and fruit.
- 1 no Wire Drying Rack.
- 1 no Tray (oven proof )
- Method:-
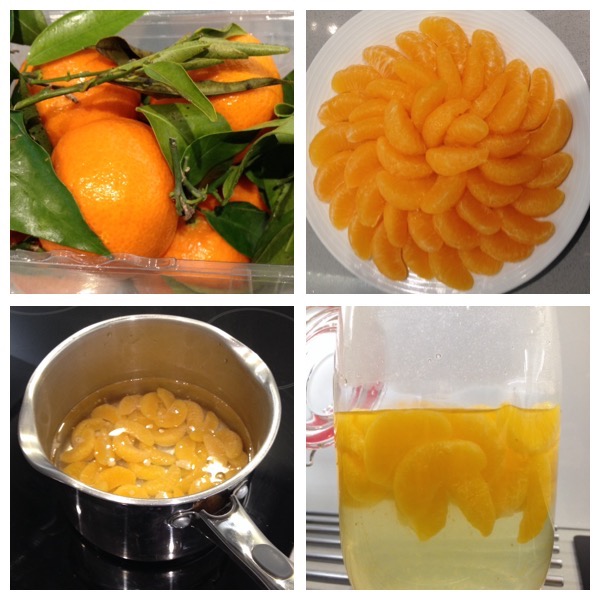
- 1 Wash & dry the Clementines, peel and carefully pull the segments apart.
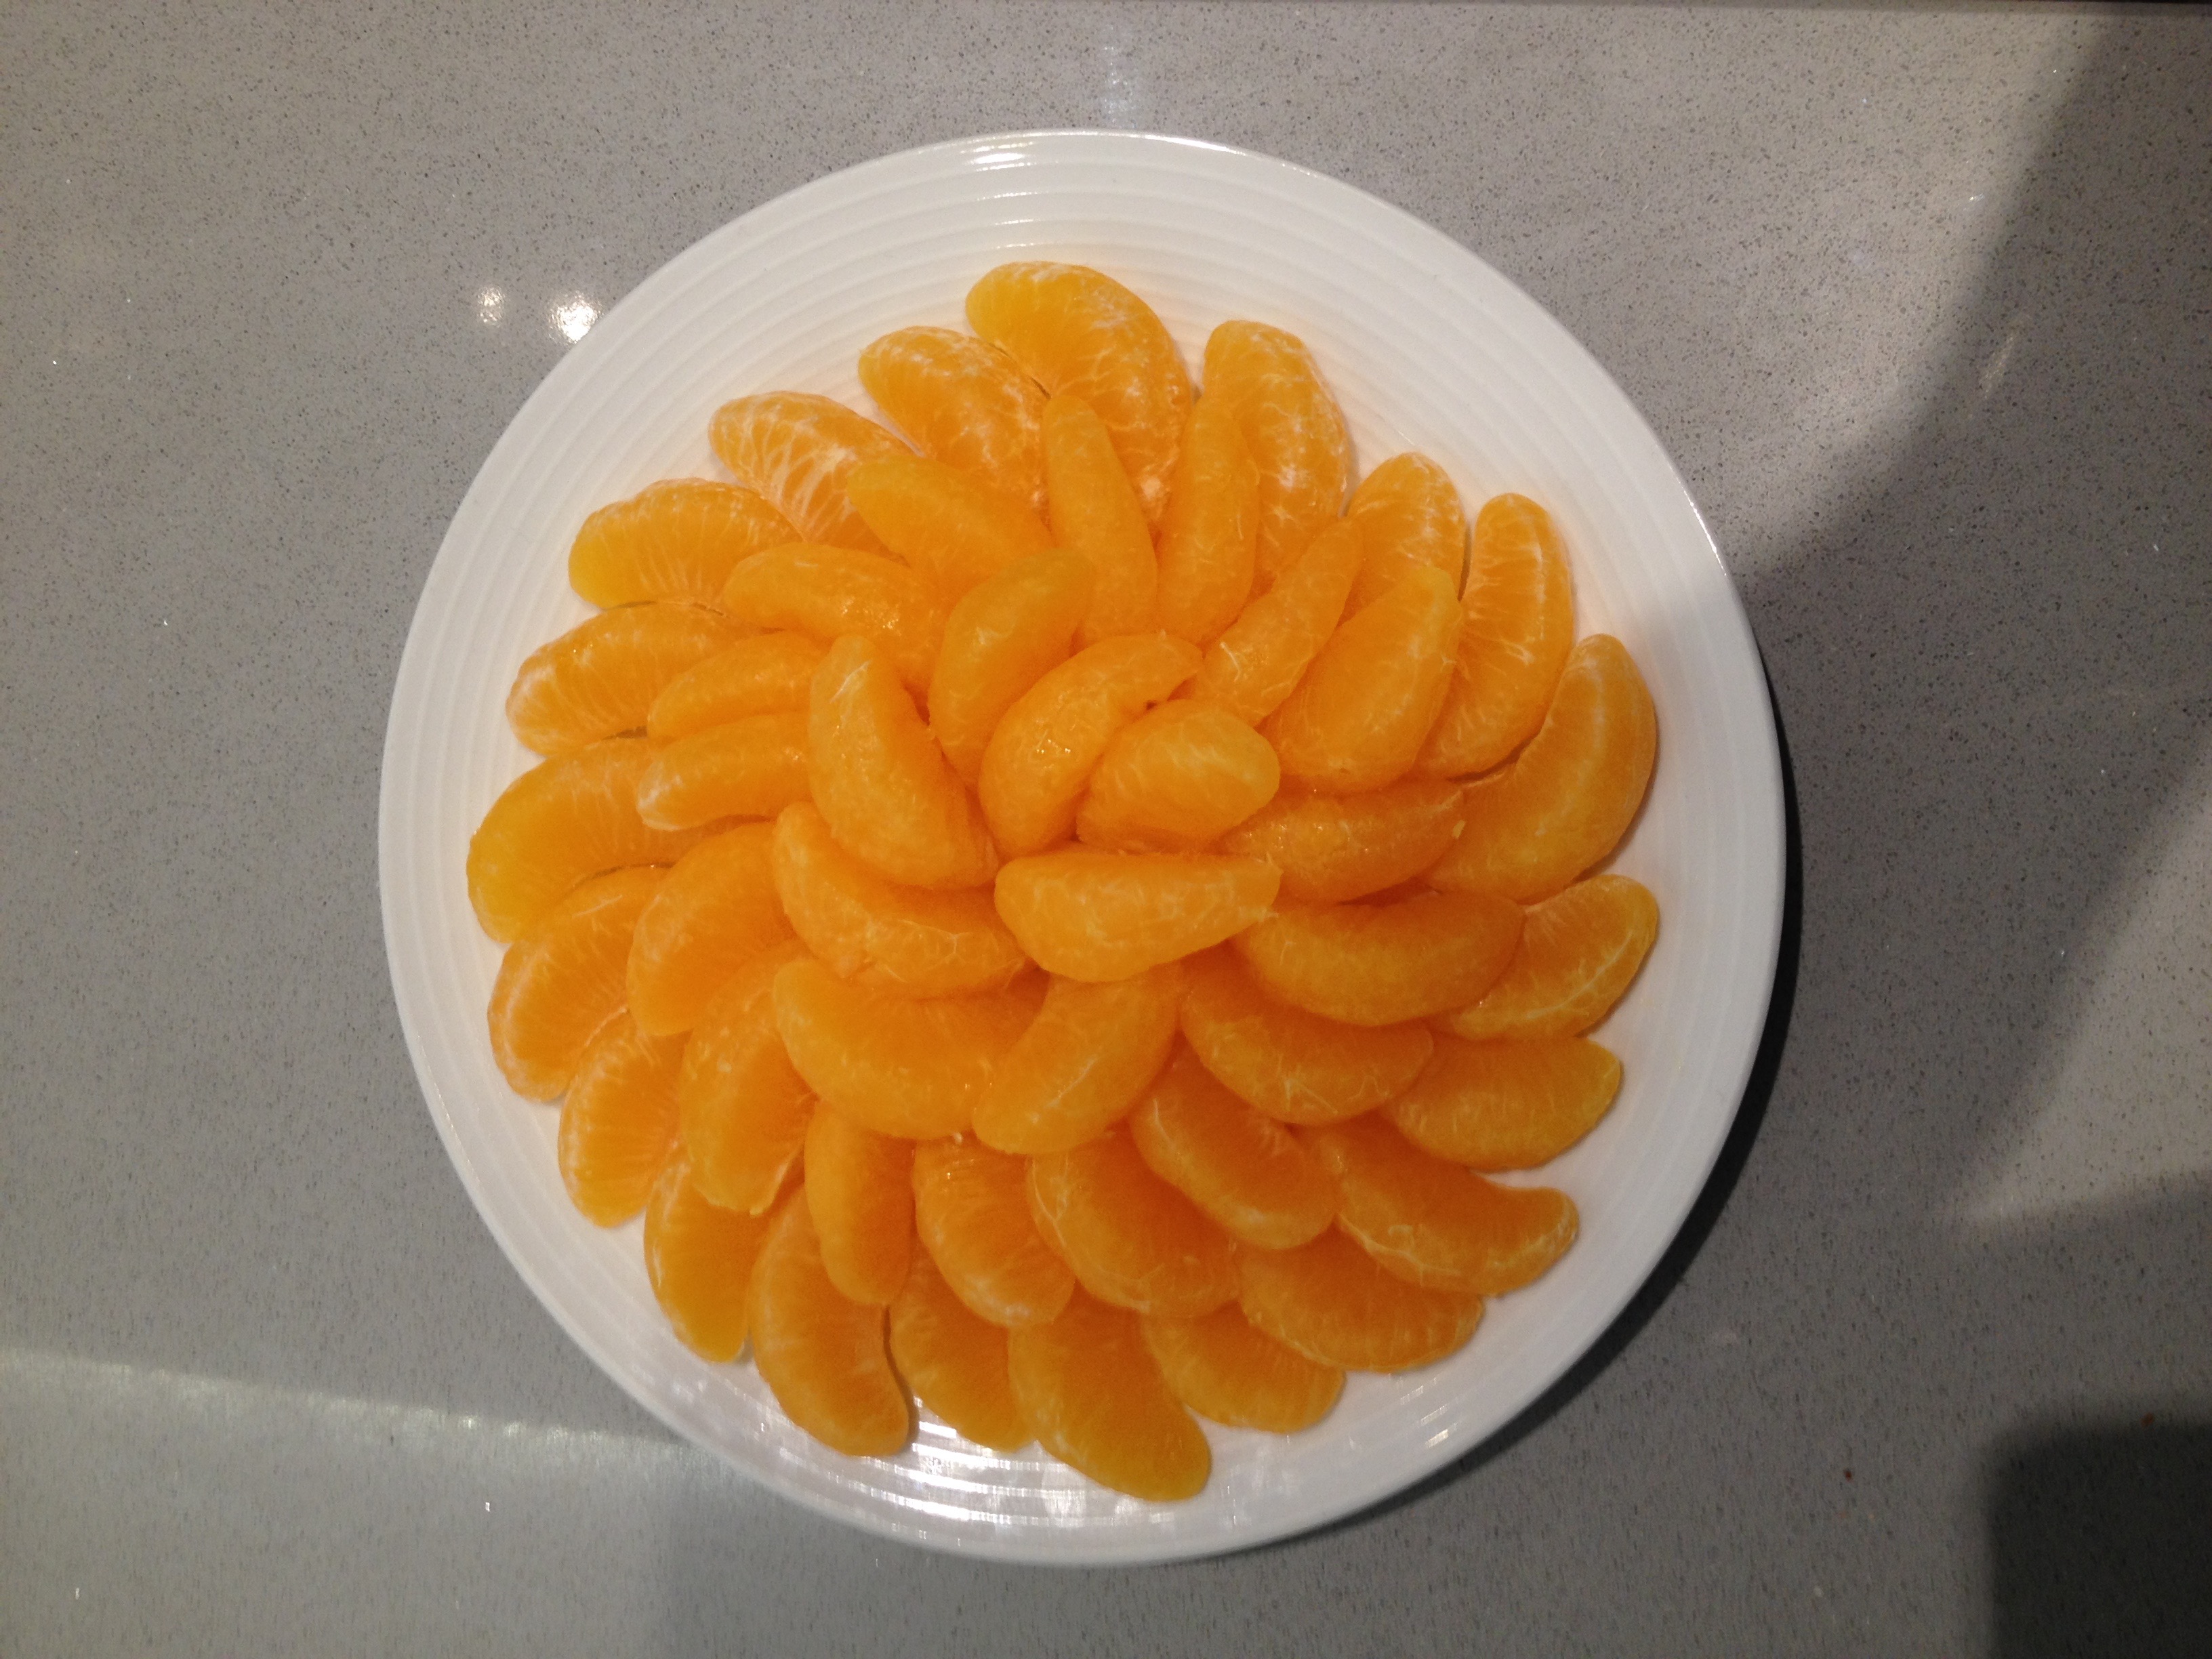
- 2 De-thread the Clementine segments removing all the pith. Pat dry and set aside.
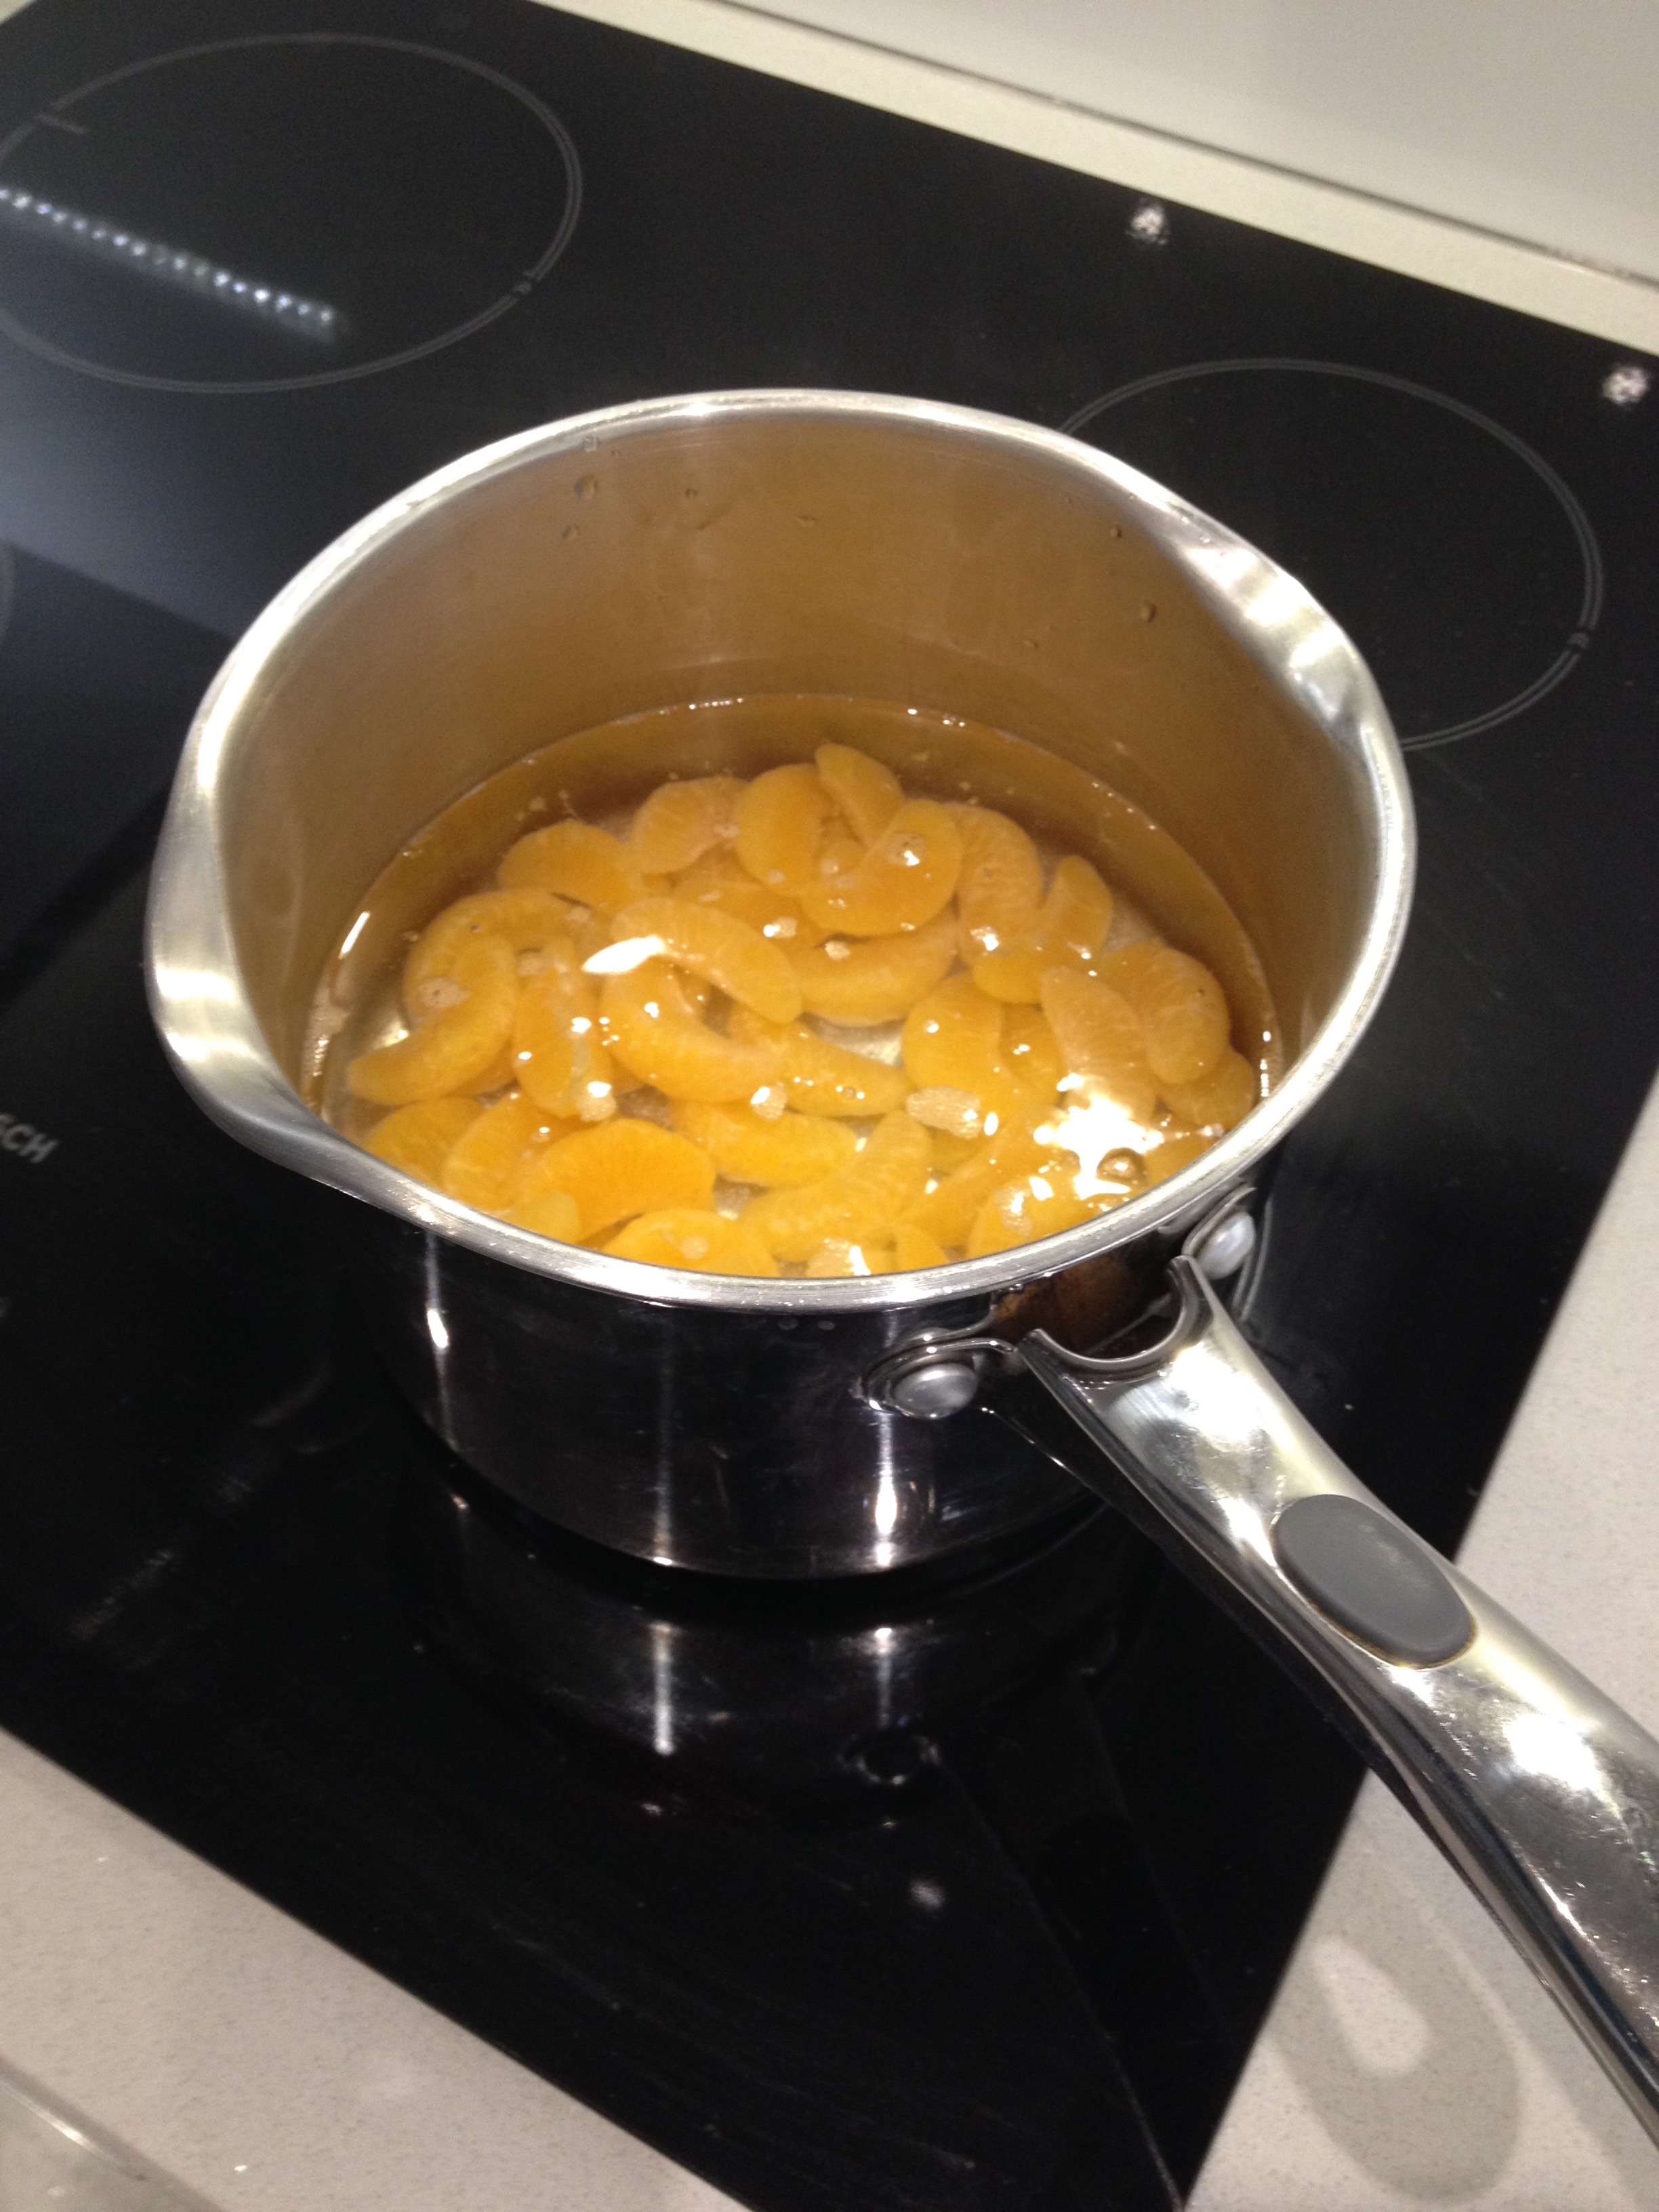
- 3 Add the Clementines to the Saucepan and cover the fruit with approximately 1 inch (25 mm) of water.
- 4 Bring the Clementines to the boil and simmer for 4 or 5 minutes until tender.
- 5 Add 1 cup of either Corn Syrup, Glucose Syrup or Honey and 2 cups of Granulated Sugar. The syrups are added to stop the sugar from crystallisation during the Confit Clementine process.
- 6 Continue to simmer, stirring occasionally until the sugar and syrup is completely dissolved.
- 7 Pour the resulting syrup and Clementine segments into the Pot / Kilner Jar (sterilised). Allow to cool and cover for 2 days.

- 8 After 2 days remove the Clementine segments from the Pot / Jar setting aside in a bowl, pour the syrup into the saucepan and add ½ cup of Granulated Sugar to the syrup, gently bring the syrup to the boil ensuring the sugar is fully dissolved. (n.b. Do not allow the syrup to darken).
- 9 Put the Clementines back in the Pot / Jar and tip the boiling syrup over the Clementines and allow to cool and cover for 2 days.
- 10 Every 2 days repeat the process (items 8&9 above) of boiling the syrup and adding a ½ cup of Granulated Sugar each time for approximately 14 days (it may take a few more days depending on the size of the fruit).
- 11 When complete the Clementine segments will be translucent.
- 12 Remove the Clementine segments from the Pot / Jar and lay the Clementine segments onto a rack to drain over kitchen paper for an hour or two.

- 13 Pat the Clementine segments dry and lay on a rack positioned into a tray and put into a pre heated oven on low temperature of 50deg C for 6 hours. Turn segments over midway.

- 14 After 6 hours check to see if Confit Clementine segments are dry. Leave to cool then half dip into tempered 70% dark chocolate, laying the segments on their sides onto greaseproof silicone non stick paper until the chocolate has set.
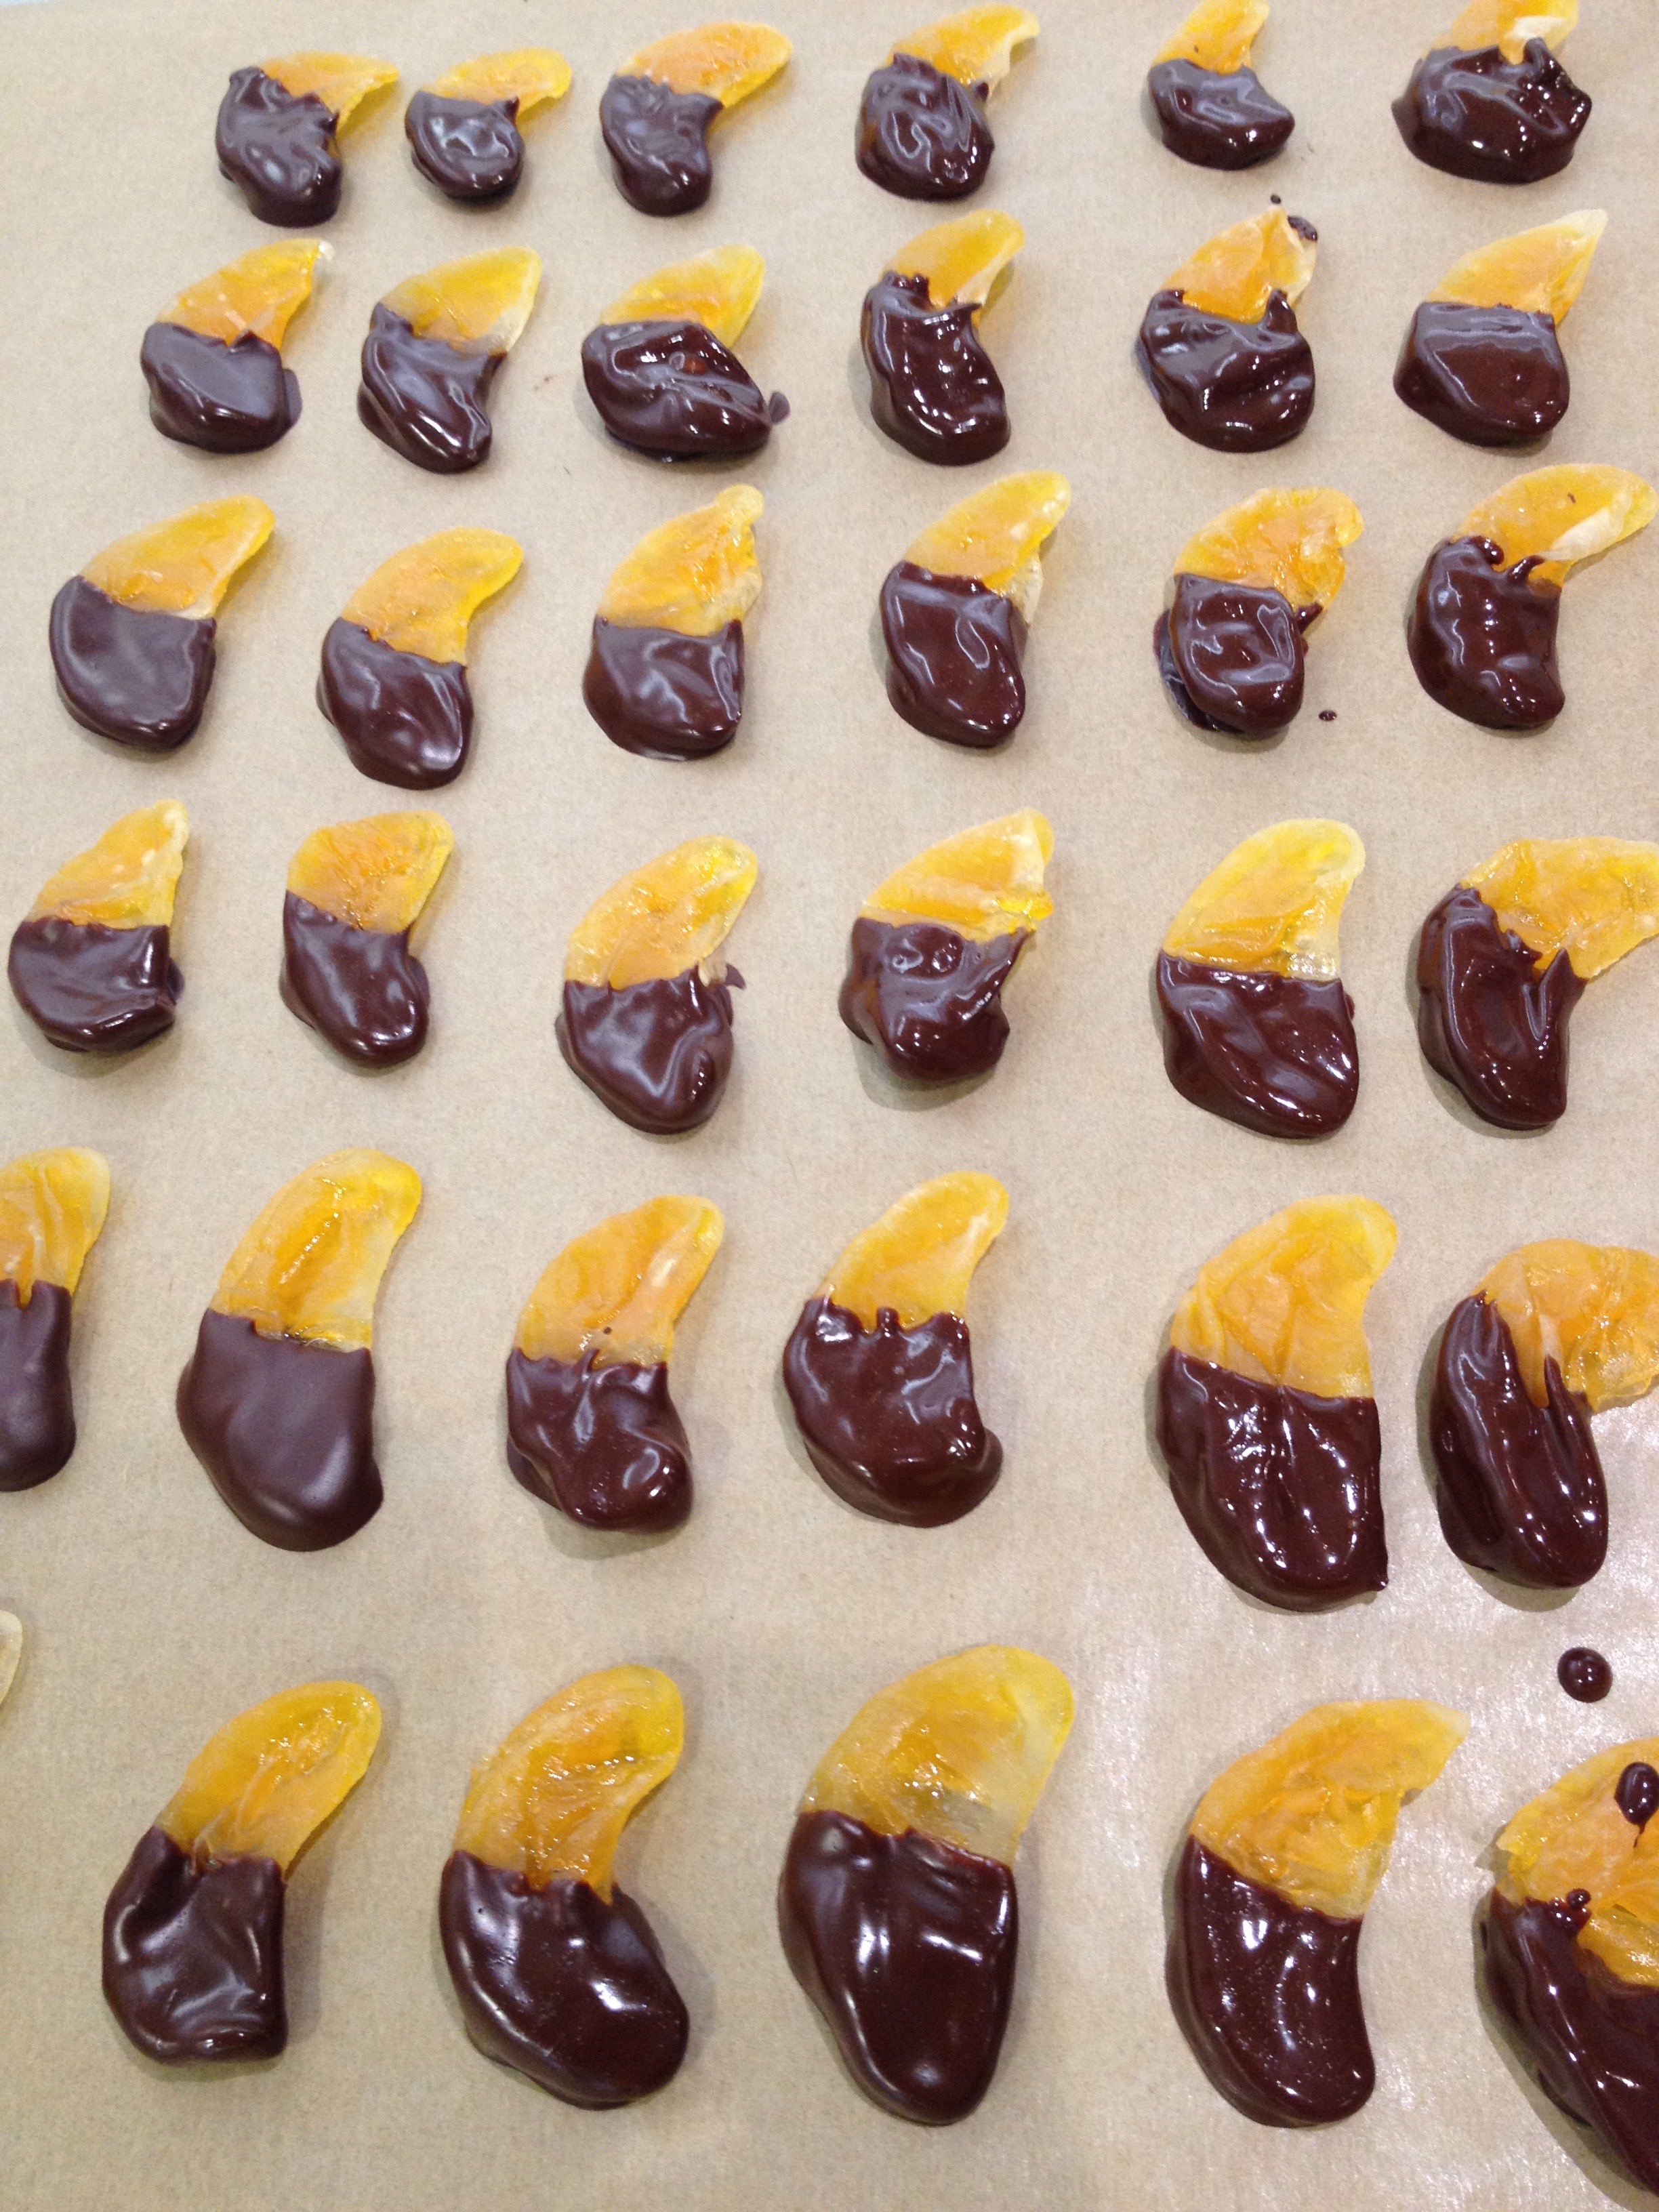
- 15 Put the Confit Clementine segments into an airtight container in layered with greaseproof silicone non stick paper. Keep at room temperature do not refrigerate.
-
How did my experiment turn out?
- It was a good experiment and I have learnt a few things about the confit process along the way. It takes a while to Confit Clementine and there are a number of changes I would make. I found the drying time was insufficient with my oven type and the time will need to be lengthened to 8 hours to ensure the segments were fully dry. By not being fully dry it caused the chocolate to bloom very slightly when stored my air tight container.
- If you have the time its well worth doing as a special treat, especially in the run up to Christmas when Clementines are plentiful.
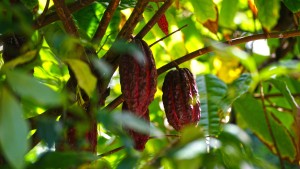 So what is the the Cacao belt? Its the narrow band 20 degrees either side of the equator. Cacao (Theobroma Cacao) plants thrive in high humidity and in areas of high rainfall (40 to 100 inches per year).
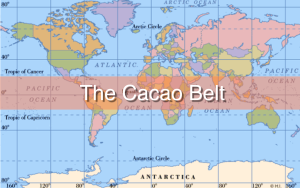
 I was inspired to start making chocolates at home by a visit to the London shop of Paul A Young the Artisan Chocolatier. My first attempt at making my own chocolates at home was to attempt to make peppermint fondants. These were made in a flexible mould with hollow cases from